Windmill cookies, also known as “Speculaas” in the Netherlands, are a beloved traditional treat that bring the essence of Dutch baking right into your kitchen. These spiced cookies, often shaped like windmills, capture the warmth of cozy afternoons and festive celebrations. Their blend of rich spices, sweet brown sugar, and crunchy almonds makes them a delightful snack for any occasion.
In this blog post, we’ll guide you through making these delicious windmill cookies. Whether you’re baking for the holidays or just looking to enjoy a taste of traditional Dutch cuisine, this recipe will transport you to a place where the air is filled with the comforting aroma of cinnamon, nutmeg, and cloves.
- Amazon For Babies:
- Pampers Swaddlers Diapers – Size 4
- Huggies Natural Care Sensitive Baby Wipes
- Video Baby Monitor with Camera and Audio
The Charm of Windmill Cookies
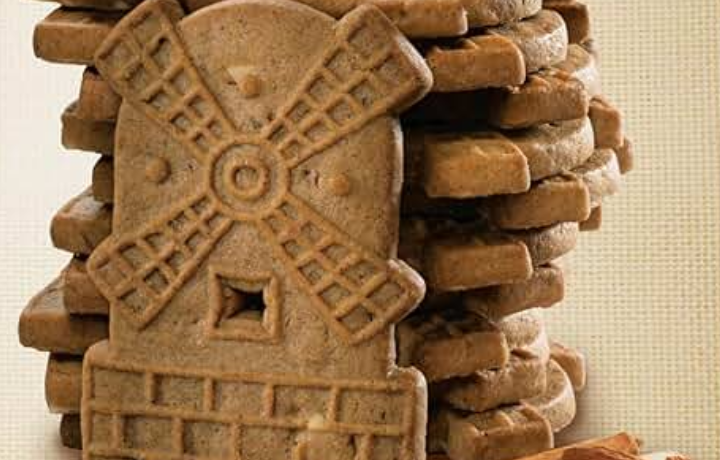
Windmill cookies aren’t just tasty; they’re steeped in history. Traditionally, these cookies were made in the shape of windmills as a tribute to the iconic structures that dot the Dutch landscape. The flavor of these cookies is what truly sets them apart.
The combination of cinnamon, nutmeg, cloves, and mace creates a deep, warming spice that’s perfect for cool weather. Add to this the crunch of almonds, and you have a cookie that’s rich in flavor and texture.
Ingredients for Windmill Cookies
To make these delicious windmill cookies, you will need the following ingredients:
- 1 cup butter
- 2 cups brown sugar, packed
- 1 tsp. baking soda
- 1/2 cup hot water
- 4 cups flour
- 1 tsp. cinnamon
- 1/2 tsp. nutmeg
- Dash of ground cloves
- 1/2 tsp. mace
- 3/4 cup blanched, slivered almonds
- More recipes:
- Homemade Mexican Pizza: A Fun, Family-Friendly Twist on a Classic
- Decadent Blueberry Cheesecake Recipe
- Elevate Your Steak Game with Easy and Delicious Steak Butter Recipe
Step-by-Step Guide to Making Windmill Cookies
1. Preparing the Dough
Begin by creaming together the butter and brown sugar in a large mixing bowl. The butter should be softened to room temperature, making it easier to blend. Using a hand mixer or a stand mixer on medium speed, mix the butter and sugar until the mixture is light and fluffy. This process helps incorporate air, resulting in a lighter cookie.
2. Dissolving the Baking Soda
In a small bowl, dissolve the baking soda in the hot water. Stir until the baking soda is completely dissolved. This step ensures that the baking soda is evenly distributed throughout the dough, which is crucial for even rising.
3. Combining Ingredients
Add the baking soda mixture to the butter and sugar. Stir well to combine. Next, add the cinnamon, nutmeg, cloves, and mace to the mixture. These spices are what give windmill cookies their signature flavor, so be sure to measure them carefully.
Gradually add the flour, one cup at a time, mixing well after each addition. The dough should start to come together and form a ball. If you find the dough is too sticky, you can add a little more flour, a tablespoon at a time, until it reaches the desired consistency.
4. Incorporating the Almonds
Once the dough is well-mixed, add the blanched, slivered almonds. Stir them into the dough until they are evenly distributed. The almonds will add a wonderful crunch to the cookies, complementing the soft, spiced dough.


5. Shaping the Dough
Divide the dough into two equal parts. Roll each portion into a log about 1 1/2 inches in diameter. The dough logs should be even and smooth, which will help ensure uniform cookies. Wrap each log in waxed paper, twisting the ends to seal. Place the wrapped dough logs in the refrigerator to chill overnight. Chilling the dough is a crucial step, as it helps the flavors meld together and makes the dough easier to slice.
6. Slicing and Baking
After the dough has chilled, preheat your oven to 350 degrees Fahrenheit (175 degrees Celsius). Line baking sheets with parchment paper or lightly grease them.
Unwrap the dough logs and use a sharp knife to slice the dough into 1/4-inch thick rounds. Place the slices on the prepared baking sheets, leaving about 1 inch between each cookie to allow for spreading.
Bake the cookies in the preheated oven for 15 to 20 minutes or until they are lightly browned around the edges. The baking time may vary depending on your oven, so keep an eye on the first batch to avoid overbaking. You want the cookies to be crisp but not too dark.
7. Cooling and Enjoying
Once the cookies are done baking, remove them from the oven and allow them to cool on the baking sheets for a few minutes. This helps them firm up and makes them easier to transfer. After a few minutes, use a spatula to move the cookies to a wire rack to cool completely.
- Stay Safe Online: Essential Tips for Protecting Your Privacy and Avoiding Scams
- The Perfect Brown Butter Raspberry Tart Recipe
- The Ultimate Honey Butter Cornbread Recipe: A Comfort Food Classic
Serving Suggestions
Windmill cookies are incredibly versatile and can be enjoyed in a variety of ways:
- With Coffee or Tea: The spiced flavor of the cookies pairs wonderfully with a hot cup of coffee or tea. The warmth of the spices complements the rich flavors of your favorite brew.
- Dipped in Chocolate: For a special treat, try dipping one edge of the cooled cookies in melted chocolate. Allow the chocolate to set before serving. This adds an extra layer of indulgence to the cookies.
- Holiday Cookie Trays: Windmill cookies are perfect for holiday gatherings. Their unique shape and spiced flavor make them a standout addition to any cookie tray.
- Gifting: Package the cookies in a decorative tin or box for a thoughtful homemade gift. They’re sure to be appreciated by anyone who loves traditional baked goods.
Tips for Perfect Windmill Cookies
- Use Fresh Spices: The key to the best flavor in these cookies is using fresh spices. If your spices have been sitting in the pantry for a while, consider replacing them to ensure the most vibrant flavor.
- Chill the Dough: Don’t skip the step of chilling the dough overnight. This helps the flavors meld and makes the dough easier to slice, resulting in cookies that hold their shape.
- Cut Even Slices: To ensure the cookies bake evenly, try to cut the slices as uniformly as possible. A ruler can be helpful if you want to be precise.
- Watch the Baking Time: Since ovens can vary, it’s a good idea to check the cookies a few minutes before the suggested baking time. You’re looking for a light golden brown color around the edges.
Storing Your Windmill Cookies
Store the cooled windmill cookies in an airtight container at room temperature. They will stay fresh for up to two weeks, although they’re so delicious they might not last that long!
For longer storage, you can freeze the cookies in a freezer-safe container for up to three months. Simply thaw them at room temperature before serving.
A Final Thought
Windmill cookies are more than just a treat; they’re a connection to the past and a taste of Dutch culture. The rich spices and crunchy almonds create a cookie that’s both comforting and sophisticated.
By following this recipe, you’ll be able to share a piece of Dutch heritage with your friends and family, creating memories with every delicious bite.
Whether you’re enjoying them with a cup of coffee, gifting them to loved ones, or savoring them as a special treat, windmill cookies are sure to bring a smile to your face. Happy baking!


